
Maintaining healthy repair margins requires precision. For technicians and wholesalers in Latin America, offering reliable repairs for popular models like the Huawei Nova 11 Pro is essential for maximizing turnover and customer retention in a competitive market.
Accessing Huawei Nova 11 Pro repair parts through direct channels allows you to bypass middlemen and secure the inventory needed to service high-demand devices quickly.
|
📘 Summary Repairing the Huawei Nova 11 Pro offers Latin American technicians a lucrative opportunity to boost margins by using precise, step-by-step disassembly and high-quality direct-sourced parts. From safe battery extraction to delicate OLED calibration, mastering these specific protocols ensures efficient service delivery and maximizes customer satisfaction in a competitive market. |
🔍 Key Highlights
|
Disassembly Guide Opening the Huawei Nova 11 Pro

Opening the Huawei Nova 11 Pro requires patience because the chassis is tightly sealed. You must apply heat to soften the adhesive around the edges before inserting a pry tool to create an opening. Inserting a playing card or plastic spatula helps slice through the adhesive without damaging the mid-frame or the rear glass cover. Once the initial seal is broken, carefully work your way around the perimeter to release the clips holding the assembly together. Proper organization of the dual nano SIM card tray is crucial to prevent loss during this process.
Structural integrity relies on how you handle the internal components once the device is open. The flex cables connecting the buttons and ports are fragile and can tear if pulled too aggressively. It is advisable to use spudgers to lift connectors rather than pulling on the wires directly. Keeping track of screw lengths is vital, as mixing long screws into short holes can crack the motherboard. For those needing replacements, you can source the LCD frame middle chassis if the original structure is bent.
"Precision in the first five minutes of a repair determines the success of the next five hours."
Follow this sequence to open the device safely:
- Prepare the Device: Power down the Nova 11 Pro completely and remove the dual nano SIM card tray.
- Apply Heat: Use a heat gun or heating pad set to 80°C to soften the adhesive around the perimeter of the rear glass.
- Create an Opening: Insert a precision suction cup near the bottom edge and apply pull force while inserting a thin pry tool to slice the adhesive.
- Sever the Adhesive: Slide a plastic playing card or opening pick around the entire chassis to fully release the rear cover without damaging the middle chassis.
- Disconnect Battery: Immediately locate the battery connector and disconnect it to prevent short circuits before touching any internal components.
- Label Screws: Organize removed screws by length and location to avoid board damage during reassembly.
- Lift Rear Cover: Gently lift the rear glass cover away, noting the battery glass back cover integration if replacing the full assembly.
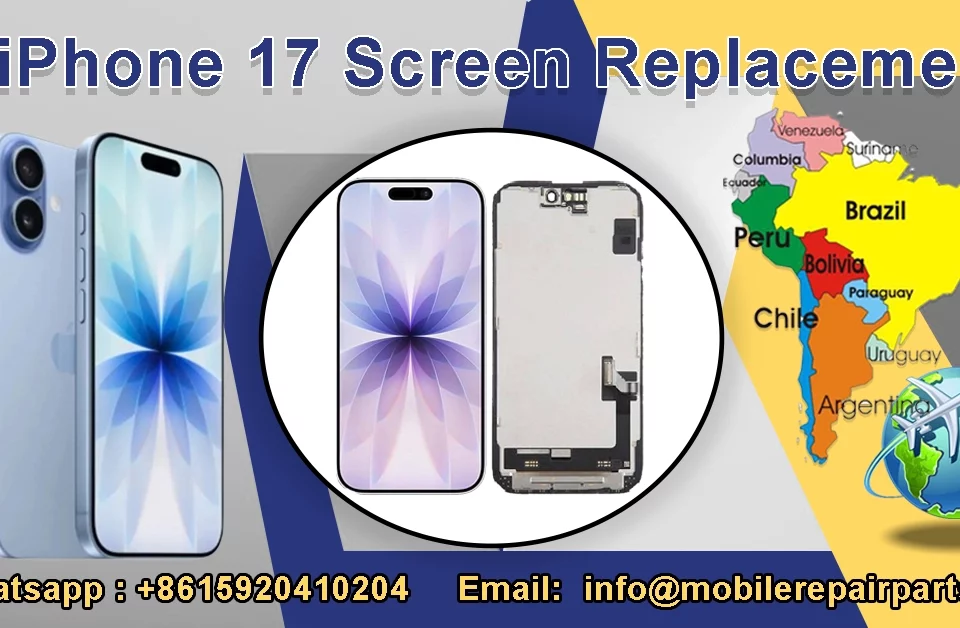
OLED Removal and Structural Integrity in Huawei Nova 11 Pro Screen Replacement

The OLED display on the Nova 11 Pro is fused to the frame, making separation a high-risk procedure. You must apply a consistent temperature of approximately 80-90°C to loosen the LOCA (Liquid Optical Clear Adhesive) holding the screen. Using a fine wire saw, gently slice through the adhesive while ensuring you do not cut into the digitizer flex or the delicate foam padding surrounding the edges. Replacing the entire assembly is often more cost-effective than screen-only repairs, given the labor involved in separation.
If the frame is damaged during removal, you must replace it to ensure the new OLED LCD display screen sits flush. Misalignment can lead to pressure points on the panel, causing dead pixels or touch failures down the line. Additionally, ensure that the fingerprint sensor ribbon is correctly routed through the frame cutout during reassembly. Ignoring this step often results in a non-functional biometric reader after the phone is closed up.
Proceed with these steps to remove and replace the OLED screen:
- Heat the Display Assembly: Apply targeted heat to the front edges to loosen the LOCA securing the OLED display screen.
- Insert Wire Saw: Carefully slide a thin cutting wire between the glass and the frame, moving it in a sawing motion to cut the adhesive.
- Lift Gently: Once the adhesive is cut, lift the display away from the frame, ensuring you do not pinch the delicate fingerprint sensor flex cable.
- Inspect Frame: Check the middle chassis for bends or debris; clean the surface thoroughly.
- Apply New Adhesive: Install precision-cut adhesive strips on the new frame to ensure the replacement screen sits flush and maintains water resistance.
- Connect Cables: Reattach the display flex cables to the motherboard, ensuring the fingerprint sensor cable is routed correctly through its specific channel.
- Test Display: Power on the device temporarily to verify touch and pixel functionality before sealing the unit.
Battery Replacement Protocols Huawei Nova 11 Pro

Replacing the Li-Ion battery involves managing strong adhesive and safety risks. You must locate the pull-tabs designed to release the battery from the chassis; however, these tabs often break in older devices. If the tab snaps, use a plastic card to slowly lift the battery, applying constant even pressure to prevent bending or puncturing the cell. Never use metal prying tools directly against the battery pouch, as puncturing a Lithium-Ion cell can cause immediate thermal runaway.
When sourcing replacements, ensure you match the specifications of the original Li-Po 4500 mAh battery to avoid capacity discrepancies. It is also the perfect time to inspect the charging board and the USB-C port connector for debris or corrosion. Cleaning these points prevents "charging slowly" errors that customers often mistake for battery failure.
| Specification | Standard Requirement |
|---|---|
| Battery Type | Li-Po (Lithium Polymer) |
| Capacity | 4500 mAh |
| Voltage | 3.82V (Typical) |
| Adhesive Type | Release Pull-Tab / Foam Tape |
Adhesive Management and Li Po Battery Huawei Nova 11 Pro
Proper adhesive management is crucial for maintaining the phone's water resistance ratings. After removing the old battery, clean the chassis residue with high-concentration isopropyl alcohol (90%+). Apply new adhesive strips or precision-cut adhesive sheets to the battery compartment before seating the new unit. Press firmly to ensure a secure bond, eliminating air gaps that could cause the battery to shift during operation.
For customers needing comprehensive repairs, check if the battery glass back cover is cracked or if the adhesive has failed. Replacing this component restores the device's premium feel and prevents dust ingress which can eventually damage the internal microphone and vibrator. Ensuring a tight seal protects the internal microphone and other sensitive components from environmental moisture.
Follow this protocol for battery installation and adhesive management:
- Clean Surface: Wipe the battery compartment with high-concentration isopropyl alcohol (90%+) to remove old glue and oils.
- Cut Adhesive Sheets: Trim the new adhesive sheets to match the exact dimensions of the Li-Po 4500 mAh battery.
- Apply Liner Removal: Remove the protective liner from the adhesive and carefully align the battery in the chassis.
- Press Firmly: Apply even pressure across the battery surface for 30 seconds to activate the adhesive bond.
- Reconnect Connector: Snap the battery flex cable back onto the motherboard connector.
- Check Nearby Components: Verify the vibrator vibration motor and internal microphone are properly seated.
- Seal Device: Replace the rear glass back cover to protect the components from dust ingress.
Camera Module Repair Calibrating Huawei Nova 11 Pro Front and Rear Lenses
The Huawei Nova 11 Pro features a sophisticated dual-front camera setup that is a major selling point. Repairing the front assembly requires careful alignment of the ultrawide front selfie camera and the telephoto front selfie camera. When disconnecting the flex cables, note the orientation of the connectors to avoid tearing the socket pins. Dust is the enemy of optics, so perform this repair in a clean environment to prevent particles from settling between the lens and the sensor.
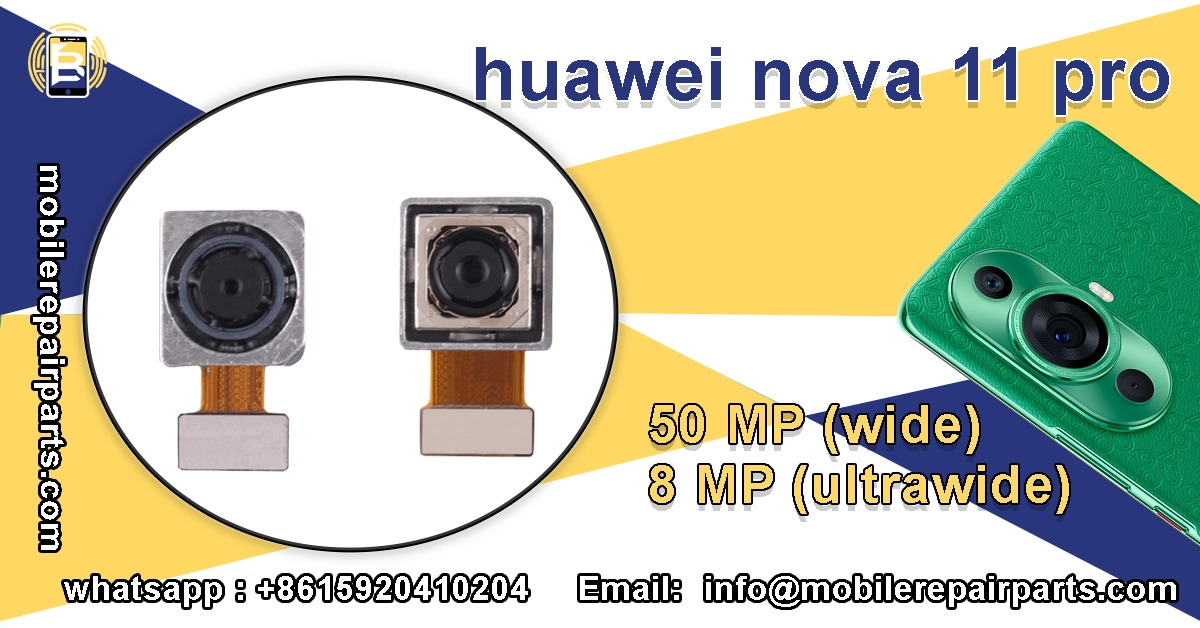
For the rear system, you will typically deal with the ultrawide back camera 8MP and the wide back camera 50MP. If the focus mechanism is stuck or the lens is scratched, replacing the entire module is more reliable than attempting lens-only swaps. Ensure the rear camera lens cover is free of scratches and oils before sealing the device, as this directly impacts photo quality.
"A misaligned camera sensor transforms a flagship phone into a blurry toy."
Post Repair Software Adjustment for Huawei Nova 11 Pro Camera Sensors
Hardware installation is only half the battle; software calibration ensures the new sensors perform correctly. Upon boot-up, enter the factory test mode (##2846579##) to verify sensor communication. Check for focus issues, pixel errors, or OIS (Optical Image Stabilization) failures. If the camera app crashes or produces washed-out images, a firmware re-flash might be required to re-tune the image processing algorithms to the new hardware modules.
Wholesalers should stock essential calibration tools to assist their technician clients. Providing a guide on how to reset the loud speaker and earpiece ear speaker configurations during software updates adds value to your parts bundle. Remember, a successful repair is defined by both hardware function and software stability.
Use this sequence for camera installation and calibration:
- Disconnect Flex Cables: Remove the screws securing the camera bracket and gently disconnect the flex cables.
- Extract Modules: Lift the camera modules out of their sockets, taking care not to touch the lenses or sensors with bare fingers.
- Install Replacements: Place the new wide back camera 50MP and ultrawide back camera 8MP modules into the chassis, ensuring they sit flush.
- Secure Bracket: Re-attach the metal bracket and screws to hold the modules firmly in place.
- Clean Lens Cover: Wipe the exterior rear camera lens cover clean to ensure no dust affects the final image quality.
- Enter Factory Mode: Power on the device and dial
*#*#2846579#*#*to access the hidden factory engineering menu. - Run Calibration: Select the "ISP Calibration" tool to tune the image processor to the new sensor and verify OIS functionality.
- Test Audio: While in test mode, verify that the loud speaker and earpiece ear speaker are functioning correctly.
Precision Tooling Requirements for Repairing the Huawei Nova 11 Pro
Using the correct tooling differentiates a professional technician from an amateur. You will need a precision screwdriver set compatible with Huawei's proprietary security screws. A high-quality heating pad or adjustable temperature gun is necessary for softening adhesives without warping the frame. Plastic spudgers, with serrated tips, and a suction cup are the bare minimum for safe disassembly.
Diagnostic kits are equally important for troubleshooting elusive issues. Tools that allow you to test the signal flex cable and the main board flex cable can save hours of guesswork. If a customer complains about network drops, testing the dual nano SIM card tray and the nano SIM connector should be part of your standard workflow.
Essential Screwdrivers and Diagnostic Kits for Huawei Nova 11 Pro Maintenance

Investing in magnetic mats helps organize screws, preventing them from getting lost or mixed up. For button repairs, ensure you have replacements for the volume side button outer and the power button outer on hand, as these are often lost during disassembly. A diagnostic multimeter is useful for checking the vibrator vibration motor for continuity if the haptic feedback fails.
Maintaining a comprehensive inventory of small parts like flex cables and buttons can significantly increase your average repair value. When a customer brings in a phone for a screen replacement, identifying and offering to fix a loose charging port or a malfunctioning volume button builds trust and revenue.
Follow this checklist to prepare your tools and diagnose components:
- Prepare Precision Screwdrivers: Gather a set including Phillips #00, #000, and Torx T2/T3 drivers to handle the variety of screw sizes found in the device.
- Set Up Heating Station: Use a variable temperature heat gun or a heating pad capable of maintaining 80-90°C to soften adhesive without overheating the battery.
- Organize Opening Tools: Have plastic spudgers, tweezers with serrated tips, and a heavy-duty suction cup ready to pry open the middle chassis without damaging the clips.
- Utilize Magnetic Mat: Place all removed screws on a magnetic mat with labeled sections to prevent mixing up long and short screws.
- Prepare Diagnostic Kit: Keep a multimeter and USB-C power meter handy to test the charging board and charging port connector functionality during reassembly.
- Inspect Small Components: Use a magnifying lamp or microscope to inspect the nano SIM connector and the vibrator vibration motor for debris or damage.
- Test Connectors: Use a multimeter in continuity mode to check the power volume buttons flex cable for breaks if buttons are unresponsive.
- Check Signal Integrity: Utilize a network diagnostic tool to verify the signal flex cable is seated correctly if the phone suffers from signal drops.
- Replace Button Outs: If the outer buttons are scratched or lost, snap on the new volume side button outer and power button outer before closing the chassis.
- Final Function Test: Perform a full check of all peripherals, including the earpiece ear speaker, to ensure the repair is complete.
Internal Layout Analysis Navigating Components Inside the Huawei Nova 11 Pro
The internal layout of the Nova 11 Pro is designed to maximize space efficiency. The motherboard is sandwiched between the frame and the sub-boards, requiring careful manipulation of the power volume buttons flex cable. Understanding the routing of these cables is critical to avoid pinching them during reassembly. The layout prioritizes the battery and camera modules, placing them in the upper and lower housing respectively to balance weight distribution.
Navigating the components requires a steady hand and a mental map of the device. The charging assembly is typically located at the bottom, intertwined with the antenna assembly. If you are replacing the charging board, be mindful of the antenna clips that secure the signal flex cable. Breaking these clips leads to signal loss issues that are difficult to diagnose without opening the phone again.
"Efficiency in repair comes from knowing the path of least resistance through the chassis."
Motherboard Shield Removal and Flex Cable Handling in Huawei Nova 11 Pro
The motherboard is protected by electromagnetic interference (EMI) shields, which are often soldered or glued in place. Removing these shields requires patience; use a hot air rework station to soften the adhesive, then gently pry them up. Do not bend the shields, as they need to sit flat to protect the board from interference. Underneath, you will find the connectors for the main board flex cable and other critical peripherals.
Flex cable handling is the most common point of failure during motherboard repairs. Always lift connectors by the plastic tab, never the wires. When reseating the nano SIM connector or the charging port connector, ensure they sit perfectly flat before snapping the locking mechanism down. Any misalignment here can result in intermittent connections that frustrate users and damage your reputation.
Follow these steps to remove shields and handle flex cables correctly:
- Identify Motherboard Layout: Familiarize yourself with the dual-board layout; note that the top board holds the cameras while the bottom board handles charging and audio.
- Route Main Flex: Carefully guide the main board flex cable through the designated chassis channel to avoid pinching it against the frame.
- Handle Button Flex: Ensure the power volume buttons flex cable is correctly seated in its retaining clip before re-attaching the rear cover.
- Secure Charging Assembly: Align the charging board with the USB-C port connector facing the cutout in the frame.
- Reassemble Layers: Reconnect the inter-board flex cables and lower the motherboard back into the chassis, ensuring the nano SIM connector aligns with the SIM tray slot.
- Apply Hot Air: Set a hot air rework station to 350°C and apply heat evenly to the EMI shields covering the motherboard components.
- Pry Shields Gently: Use tweezers to lift the edges of the shields once the adhesive is soft; avoid prying aggressively to prevent component damage.
- Unlock ZIF Connectors: Flip up the small locking bars on the ZIF (Zero Insertion Force) connectors for the main board flex cable before pulling the ribbon cables out.
- Replace Damaged Cables: If the signal flex cable shows signs of tearing, desolder the old one and solder the replacement carefully.
- Re-seat and Lock: Insert the new cables into their respective slots, ensuring they are flat, and then flip the locking bars down to secure them in place.
FAQ Huawei Nova 11 Pro
Stocking high-quality Huawei Nova 11 Pro parts ensures your repair business stays profitable and your customers stay loyal.

